For tutors
Find your way around the lesson screen
Your lesson is a live one-to-one video call with the child. Here is where to find the pictures, buttons and tools you can use together.
Music: “Rise” by Corporate Music Zone, from Free Stock Music, licensed under CC BY 4.0.
Step 1
The two pictures
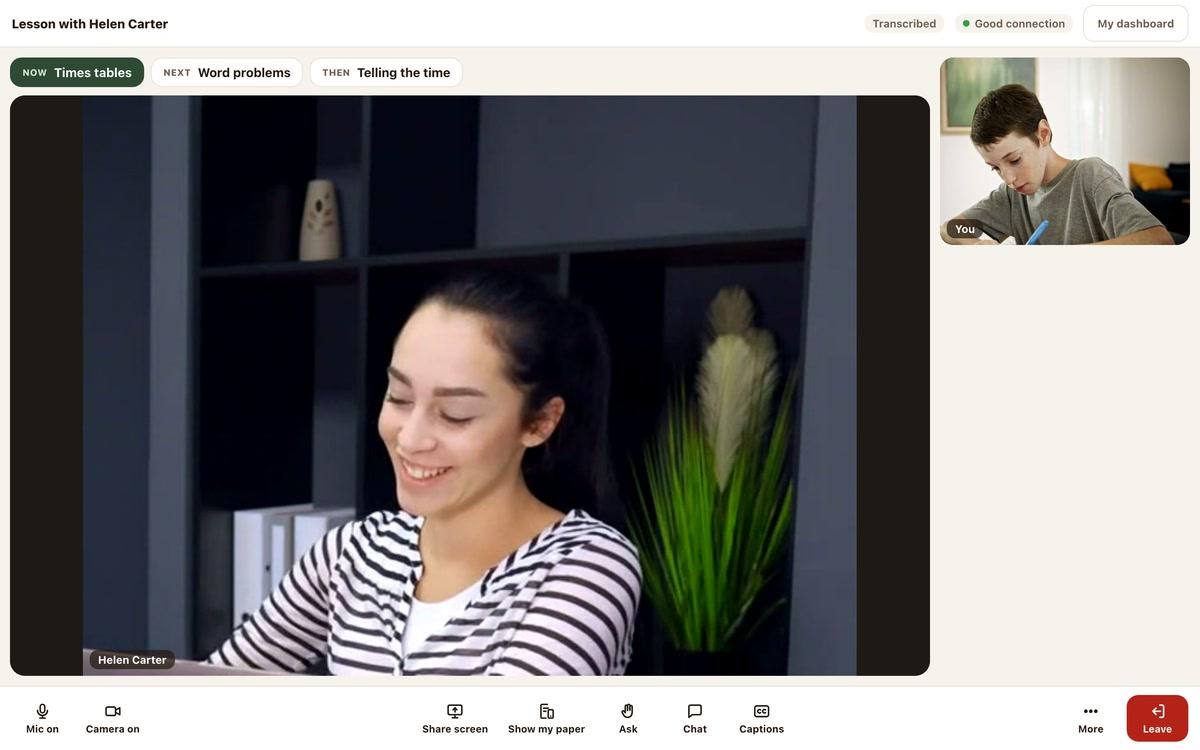
The child is in the big picture. You are in the smaller picture on the right.
You and the child can both see the two pictures.
- Child in the big picture
- You on the right
Step 2
Along the top
Along the top, you can see who the lesson is with and how good your connection is. Transcribed means what’s said in the lesson is written down, for safeguarding.
Press My dashboard to open your dashboard in a new tab.
- See who the lesson is with
- Check your connection
- Open your dashboard
Step 3
Microphone and camera
Your microphone and camera buttons are at the bottom left.
Press Mic on to turn off your microphone. Press Camera on to turn off your camera.
- Microphone and camera at bottom left
- Press to turn them off
Step 4
What you both see
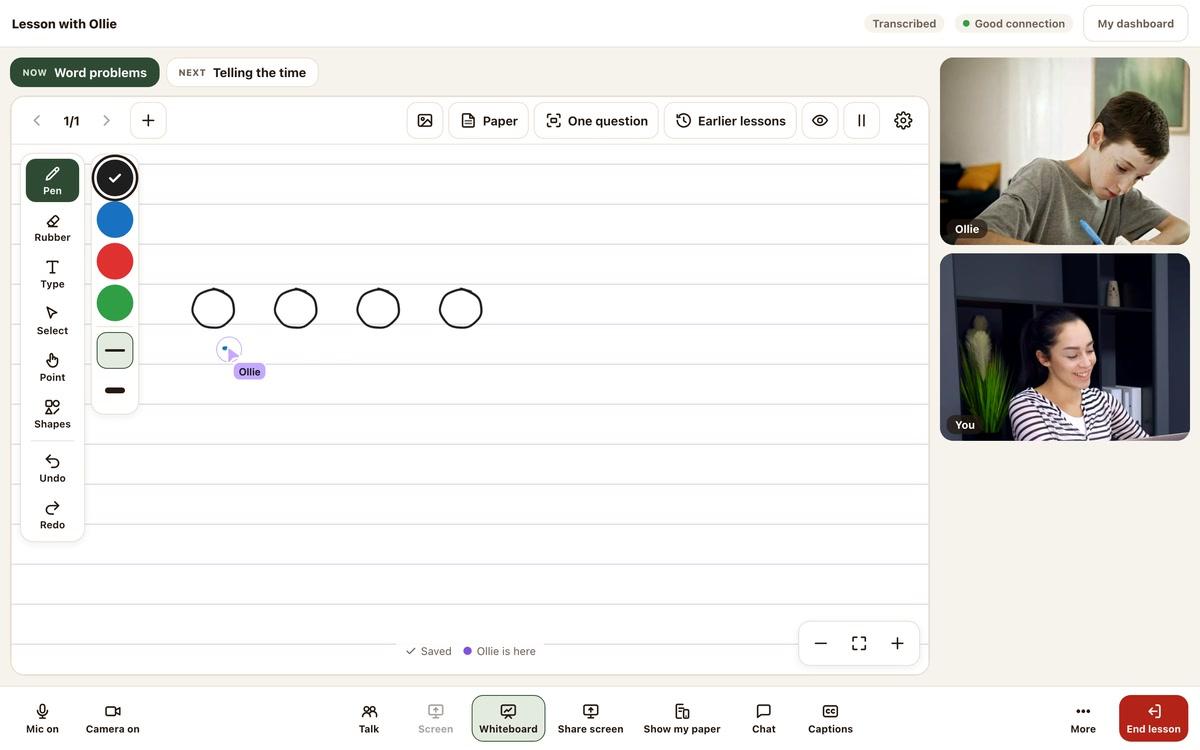
In the middle of the bottom bar, Talk, Screen and Whiteboard choose what fills the screen for you both.
Talk shows your faces. Screen shows a shared screen. Whiteboard shows the shared whiteboard.
The child is told when you change it. The layout does not change when someone speaks.
- Choose what you both see
- The child is told about changes
- Speaking does not rearrange the screen
Step 5
More options
Press More to open the menu. It includes Lesson plan and Offer a break.
The menu also has Hide my own picture and Blur my background. Background blur is not available in every browser.
Other options are Bigger captions, Calm mode (nothing moves) and Sound only (weak internet).
- Find the lesson plan
- Offer the child a break
- Adjust lesson settings
Good to know
Other tools along the bottom
Ending the lesson
Guides for each tool
Still stuck?
We will sort it out with you
Tell us what you pressed, what you saw, and which device and browser you are using.